ClevGuard Support: Monitor Devices with Others' Permission.
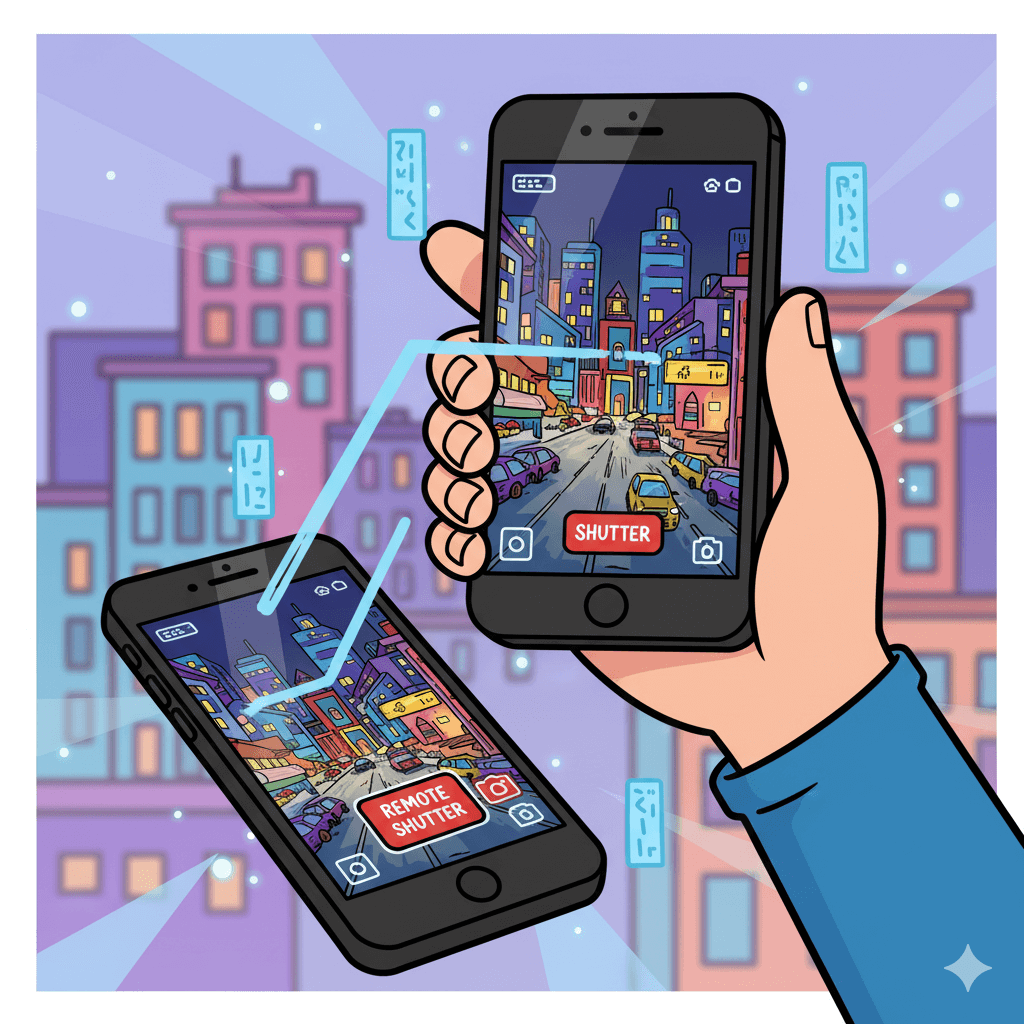
As a parent, it’s natural to want to make sure your child is safe. Maybe your teen spends time away from home, or you’re simply worried about where they are and who they’re with. Modern technology now makes it possible to remotely access a cell phone camera for legitimate safety reasons.
However, it’s important to do it safely and legally, with your child’s knowledge and consent. This guide explains how parents can use KidsGuard Pro, a reliable parental control app, to view their child’s phone camera remotely — and what to keep in mind for privacy and protection.

Table of Contents
Part 1: Why Would Parents Want to Access a Phone Camera Remotely?
Here are a few common, responsible reasons why remote camera access is useful for parents:
- Safety Check: When your child is out late or traveling alone, you can confirm their surroundings in real time.
- Emergency Situations: If your child doesn’t answer calls or messages, the camera can help you check if they’re okay.
- Home Monitoring: You can also use an old phone as a mini home security or pet camera while you’re away.
- Digital Supervision: It helps you guide your child’s digital habits and protect them from potential dangers.
Part 2: How to Remote Access Cell Phone Camera with KidsGuard Pro
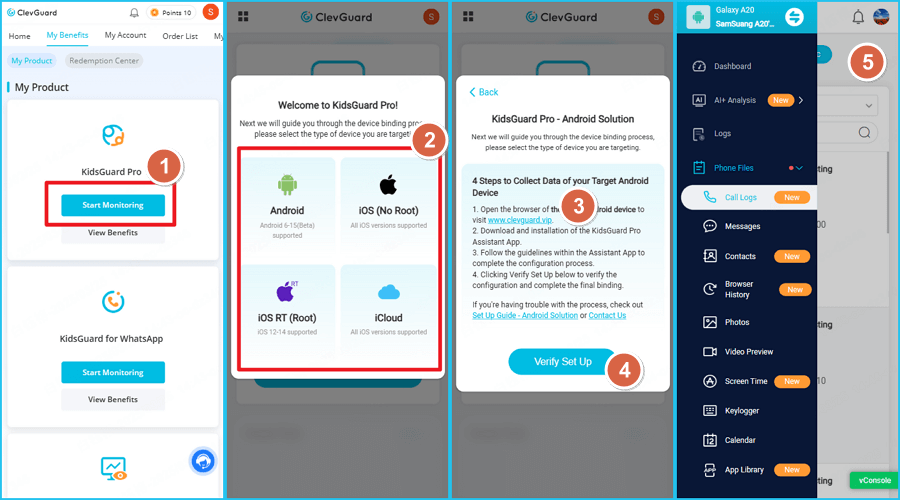
KidsGuard Pro is an all-in-one parental control app that allows you to monitor your child’s phone activity, including remote control the phone’s camera. Here’s a simple step-by-step setup guide:
Step 1. Install the App on Your Child’s Device: Using your child’s Android phone, visit the download page provided by KidsGuard Pro. Follow the on-screen guide to install the app.

Make sure you have your child’s permission before installation. KidsGuard Pro is designed for parental supervision, not for illegal use.
Step 2. Log In to the Web Dashboard: On your own phone or computer, open the KidsGuard Pro APP or Dashboard and sign in with your account. You’ll see your child’s device listed once connected successfully.
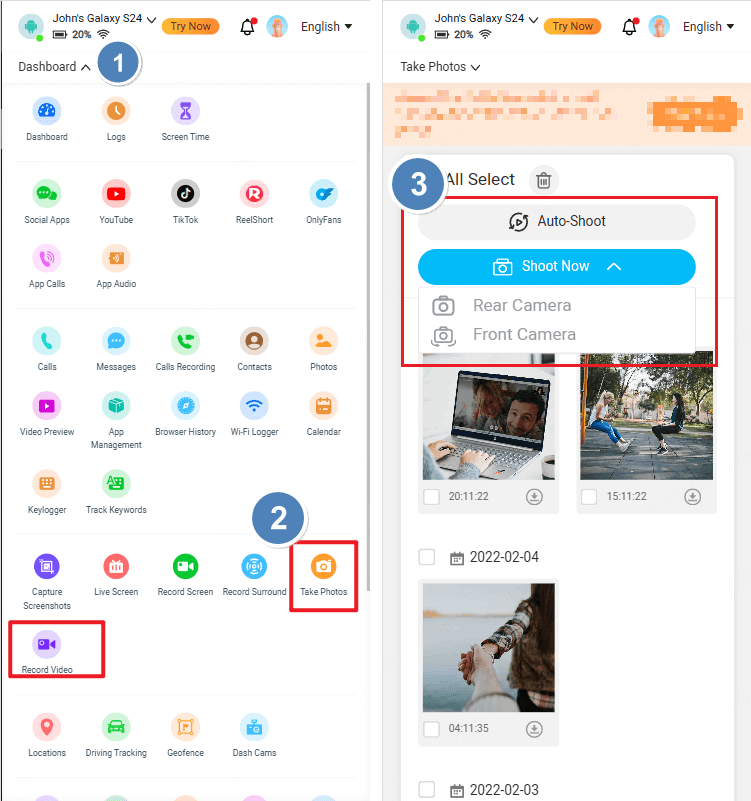
Step 3. Access the Remote Camera Feature:
In the dashboard, find the "Take Photos" or "Record Video" section. Tap it to
view your child’s camera feed or take instant pictures remotely.
You can switch between the front and rear camera, capture photos, or record
short clips.

That’s it! Within minutes, you can safely check your child’s environment in real time.
Pros and Cons of Using KidsGuard Pro for Remote Camera Access
- Real-time remote camera view
- User-friendly dashboard
- Includes GPS, app monitoring, and call tracking
- Works on Android ignoring the distance between devices
Pros
- Requires internet connection
Cons
Part 3: Alternative Options to Remote Control Phone’s Camera
If you only want a simple, safe way to use a spare phone as a camera or control an iPhone camera remotely without installing a full parental-control suite, the two most practical options are IP Camera apps (Android) and Apple Watch Camera Remote (iPhone). Here’s how to set each up step‑by‑step, with security tips for parents.
1Use an IP Camera App (e.g., IP Phone Camera / IP Webcam)
Works best on Android; you can view the feed from any browser or another phone.
What you need: an Android phone to act as the camera, a second device to view (phone/computer), and a local Wi‑Fi network or internet data.
Step-by-step setup:
Step 1. Install the app: On the phone that will be the camera, open Google Play Store → search for “IP Webcam” or “IP Phone Camera” → install the app.
Step 2. Open and grant permissions: Launch the app and accept permissions it requests (camera, microphone, storage, location if required). These are needed for live view and recording.
Step 3. Choose broadcast mode: Most IP apps offer “Local (LAN) broadcast” and “Cloud” or “Internet” broadcast.
- For better security, choose Local/Wi-Fi if both devices will be on the same network.
- Choose Cloud only if you need remote viewing from outside your home network (this may require creating an account or paying for cloud service).
Step 4. Configure video settings (optional): Set resolution (start low if network is weak), framerate, and whether to include audio. Lower settings reduce lag and data use.
Step 5. Start the server / broadcasting: Tap Start Server or Start Broadcasting. The app will show a local IP address and port (for example http://192.168.1.12:8080) or a cloud URL.
Step 6. Open the feed on the viewer device:
- If local: Connect the viewer device to the same Wi‑Fi network. Open a web browser and type the IP:port address shown by the app.
- If cloud: Open the provided cloud link or use the app’s companion viewer app and sign in.
Step 7. Control camera features: From the browser/viewer you can usually switch front/rear camera, rotate, autofocus, take photos, and sometimes control flashlight.
Step 8. Test and position: Place the camera phone where desired, plug it into power (to avoid battery drain), and test streaming stability for a few minutes.
Pros & Cons of an IP Camera App
- Cheap or free, flexible
- Works with a browser
Pros
- Requires manual setup
- Cloud features may cost money and increase privacy risk if not secured.
Cons
2Apple Watch Camera Remote (for iPhone users)
This is a quick and built‑in way to control iPhone camera remotely — but it is best for taking photos or hands‑free shots, not continuous live spying.
What you need: iPhone with the Camera app + paired Apple Watch.
Step 1. Pair your Apple Watch and iPhone: Make sure your Apple Watch is paired and connected (Bluetooth/Wi‑Fi) to the iPhone. Open the Watch app on your iPhone to confirm pairing.
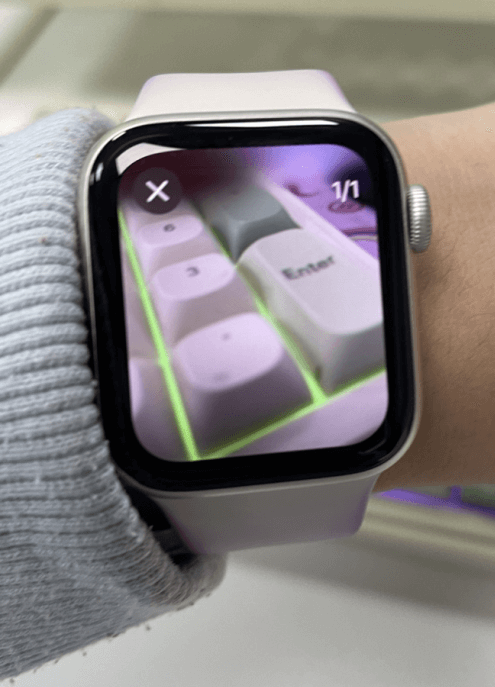
Step 2. Open Camera Remote on Apple Watch: On the watch, press the Digital Crown → open the Camera Remote app (camera‑shaped icon). This app acts as a remote viewfinder. The watch will show the iPhone’s camera view. Adjust camera settings from the watch:
- Tap the preview on the watch to focus.
- Use the watch screen to switch between front/back camera (tap the camera icon).
- For timer shots, tap the timer icon on the watch (3s/10s).
Step 3. Take the photo: Tap the shutter button on the Apple Watch screen, and at the same time you can know what happens around the target iPhone from your Apple Watch.

Step 4. For short video or Live Photo: On watch you can preview and start/stop video recording depending on iOS/watchOS support—check that both devices are updated.
Pros & Cons of Apple Watch Camera Remote
- Built‑in, reliable, simple
- No third‑party apps
- Preserves privacy
Pros
- Not a continuous surveillance tool
- Requires the child’s iPhone to be an Apple device and paired with a watch
Cons
Quick Comparison & Which to Choose
Choose IP Camera apps if you want a low‑cost continuous monitoring option (use a spare Android phone as a home camera), but secure the stream with passwords and prefer local‑only viewing whenever possible.
when you need occasional, consensual remote photos or to help a child take a hands‑free picture, use Apple Watch Camera Remote — it’s simple and privacy‑friendly.
However, for complete child safety monitoring, KidsGuard Pro remains the most secure and parent-friendly solution.
Conclusion
Remote access to a cell phone camera can be a powerful tool for responsible parenting — when used safely and with consent. KidsGuard Pro gives you the ability to check on your child’s safety anytime, anywhere, without invading their privacy.
If you’re a caring parent looking for peace of mind, try KidsGuard Pro today and protect what matters most — your child’s safety and well-being.


